App 异形(水滴)导航栏Tabbar栏 实现 图文讲解
演示

截图

分析
第一步(状态)
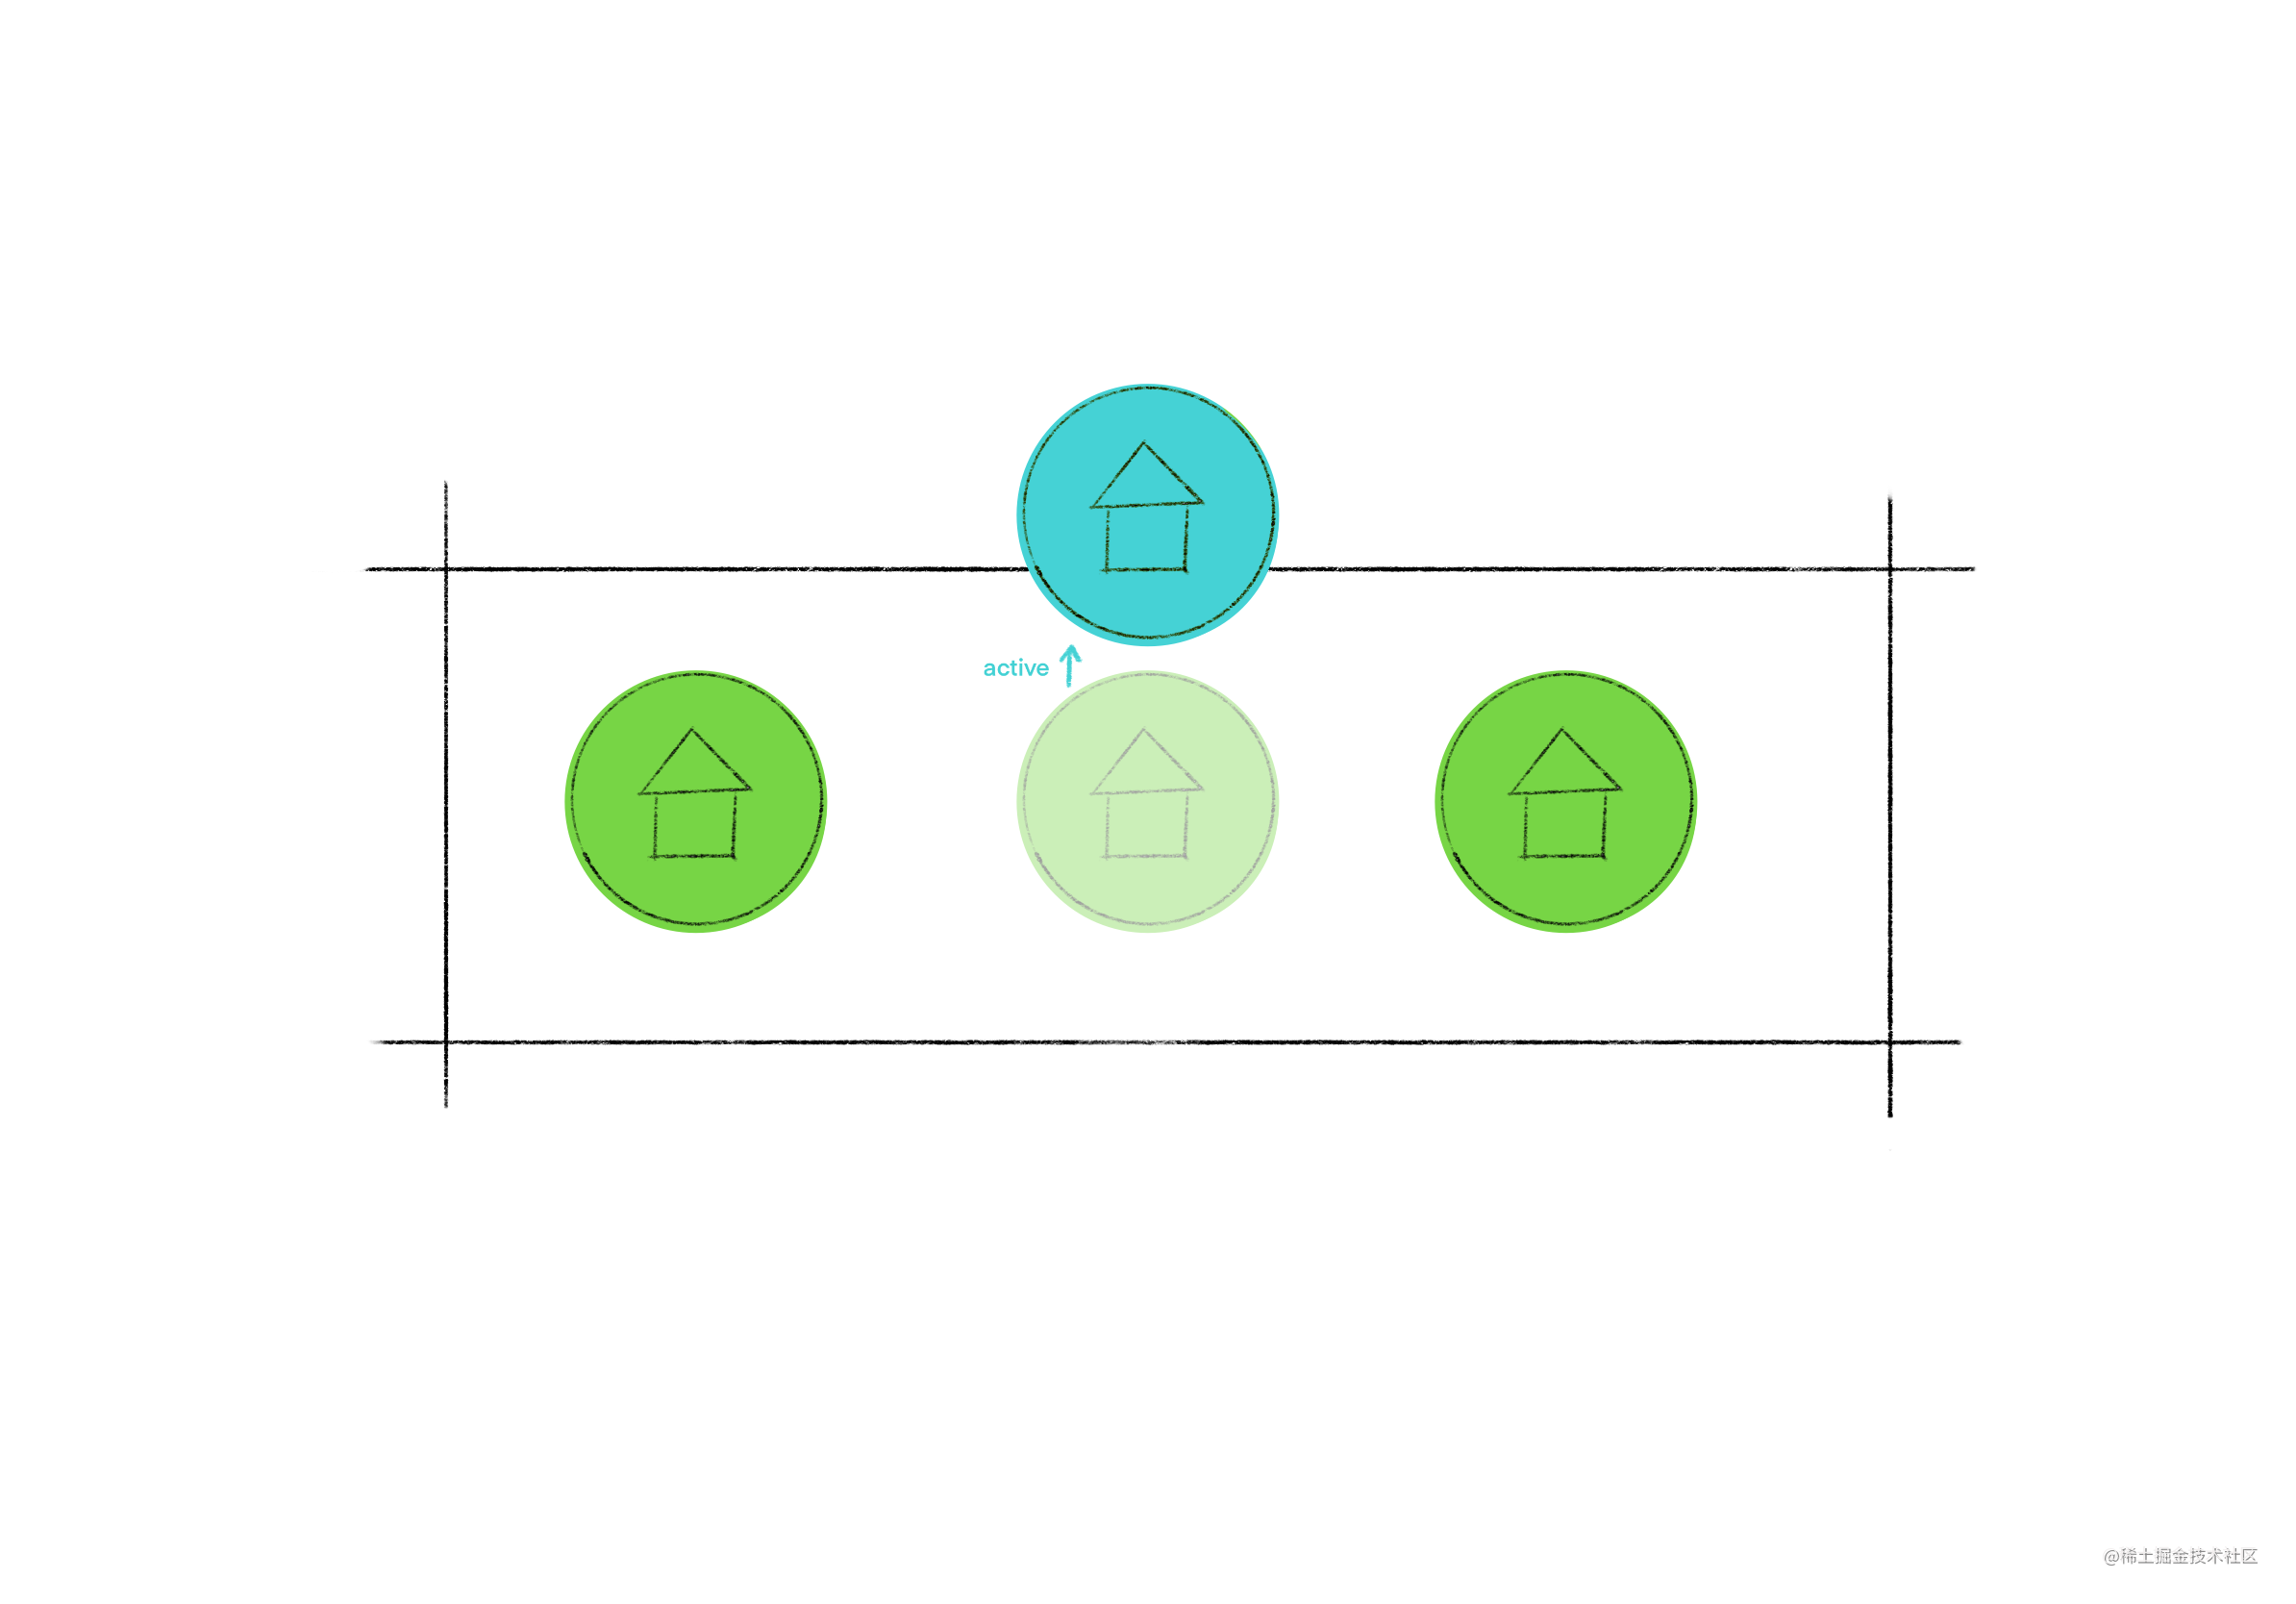
通过改变状态获取到当前的 tabbar index。
然后添加 active 动效。是最基础的 Tabbar 栏。
第二步(背景)
在演示图中可以发现 Tabbar 栏的 activeItem 后面是透明可见的。
要实现这种效果需要使用 Canvas 多个坐标点绘制。
在 JS 中可以用 canvas,这里用 Flutter CustomPaint 这个类绘制。
采用 canvas 绘制的原因在第三步有解释。
第三步(圆角)
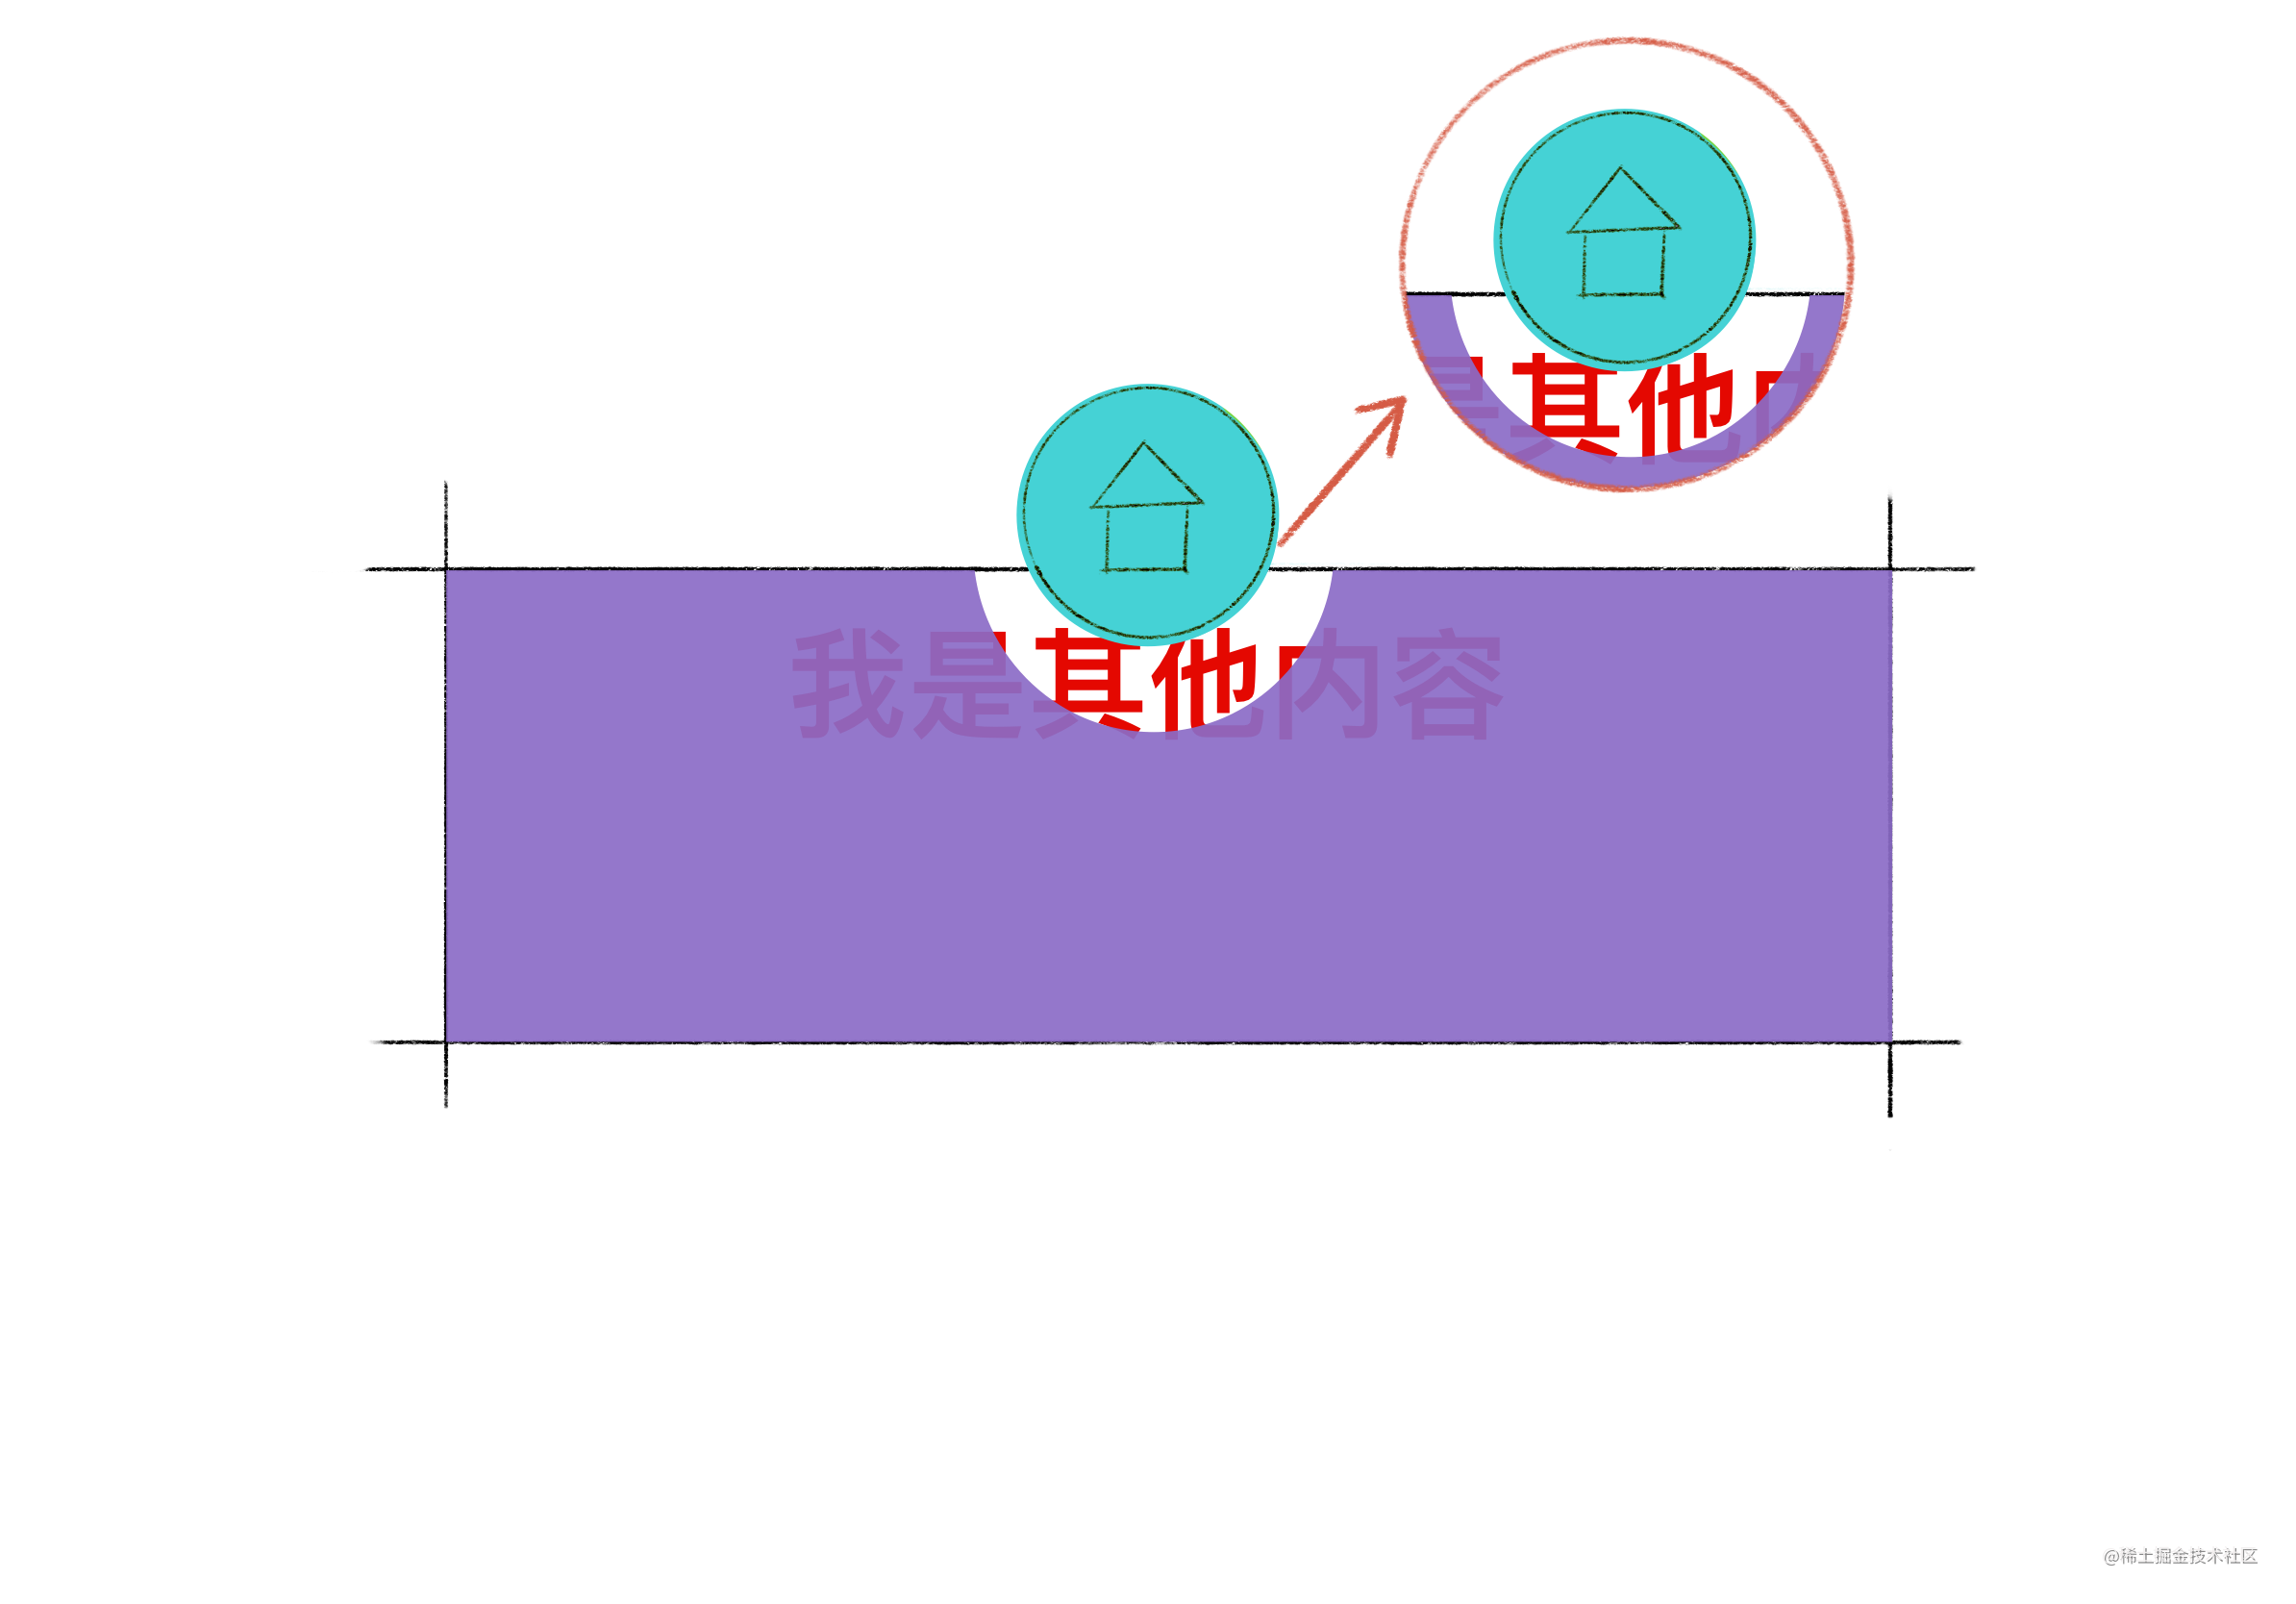
如 图 1 演示,该图可以发现在边缘位置的锐角。
在国内和 Youtube 的文章或视频中都是采用 activeItem 的左右加上半圆或圆形的方法。
这种方法有个弊端就是背景色采用 tabbar 或者当前页面的颜色,页面里面的内容会被背景色覆盖掉。
所以采用 canvas 绘制,使用三阶贝塞尔曲线去实现圆角功能。
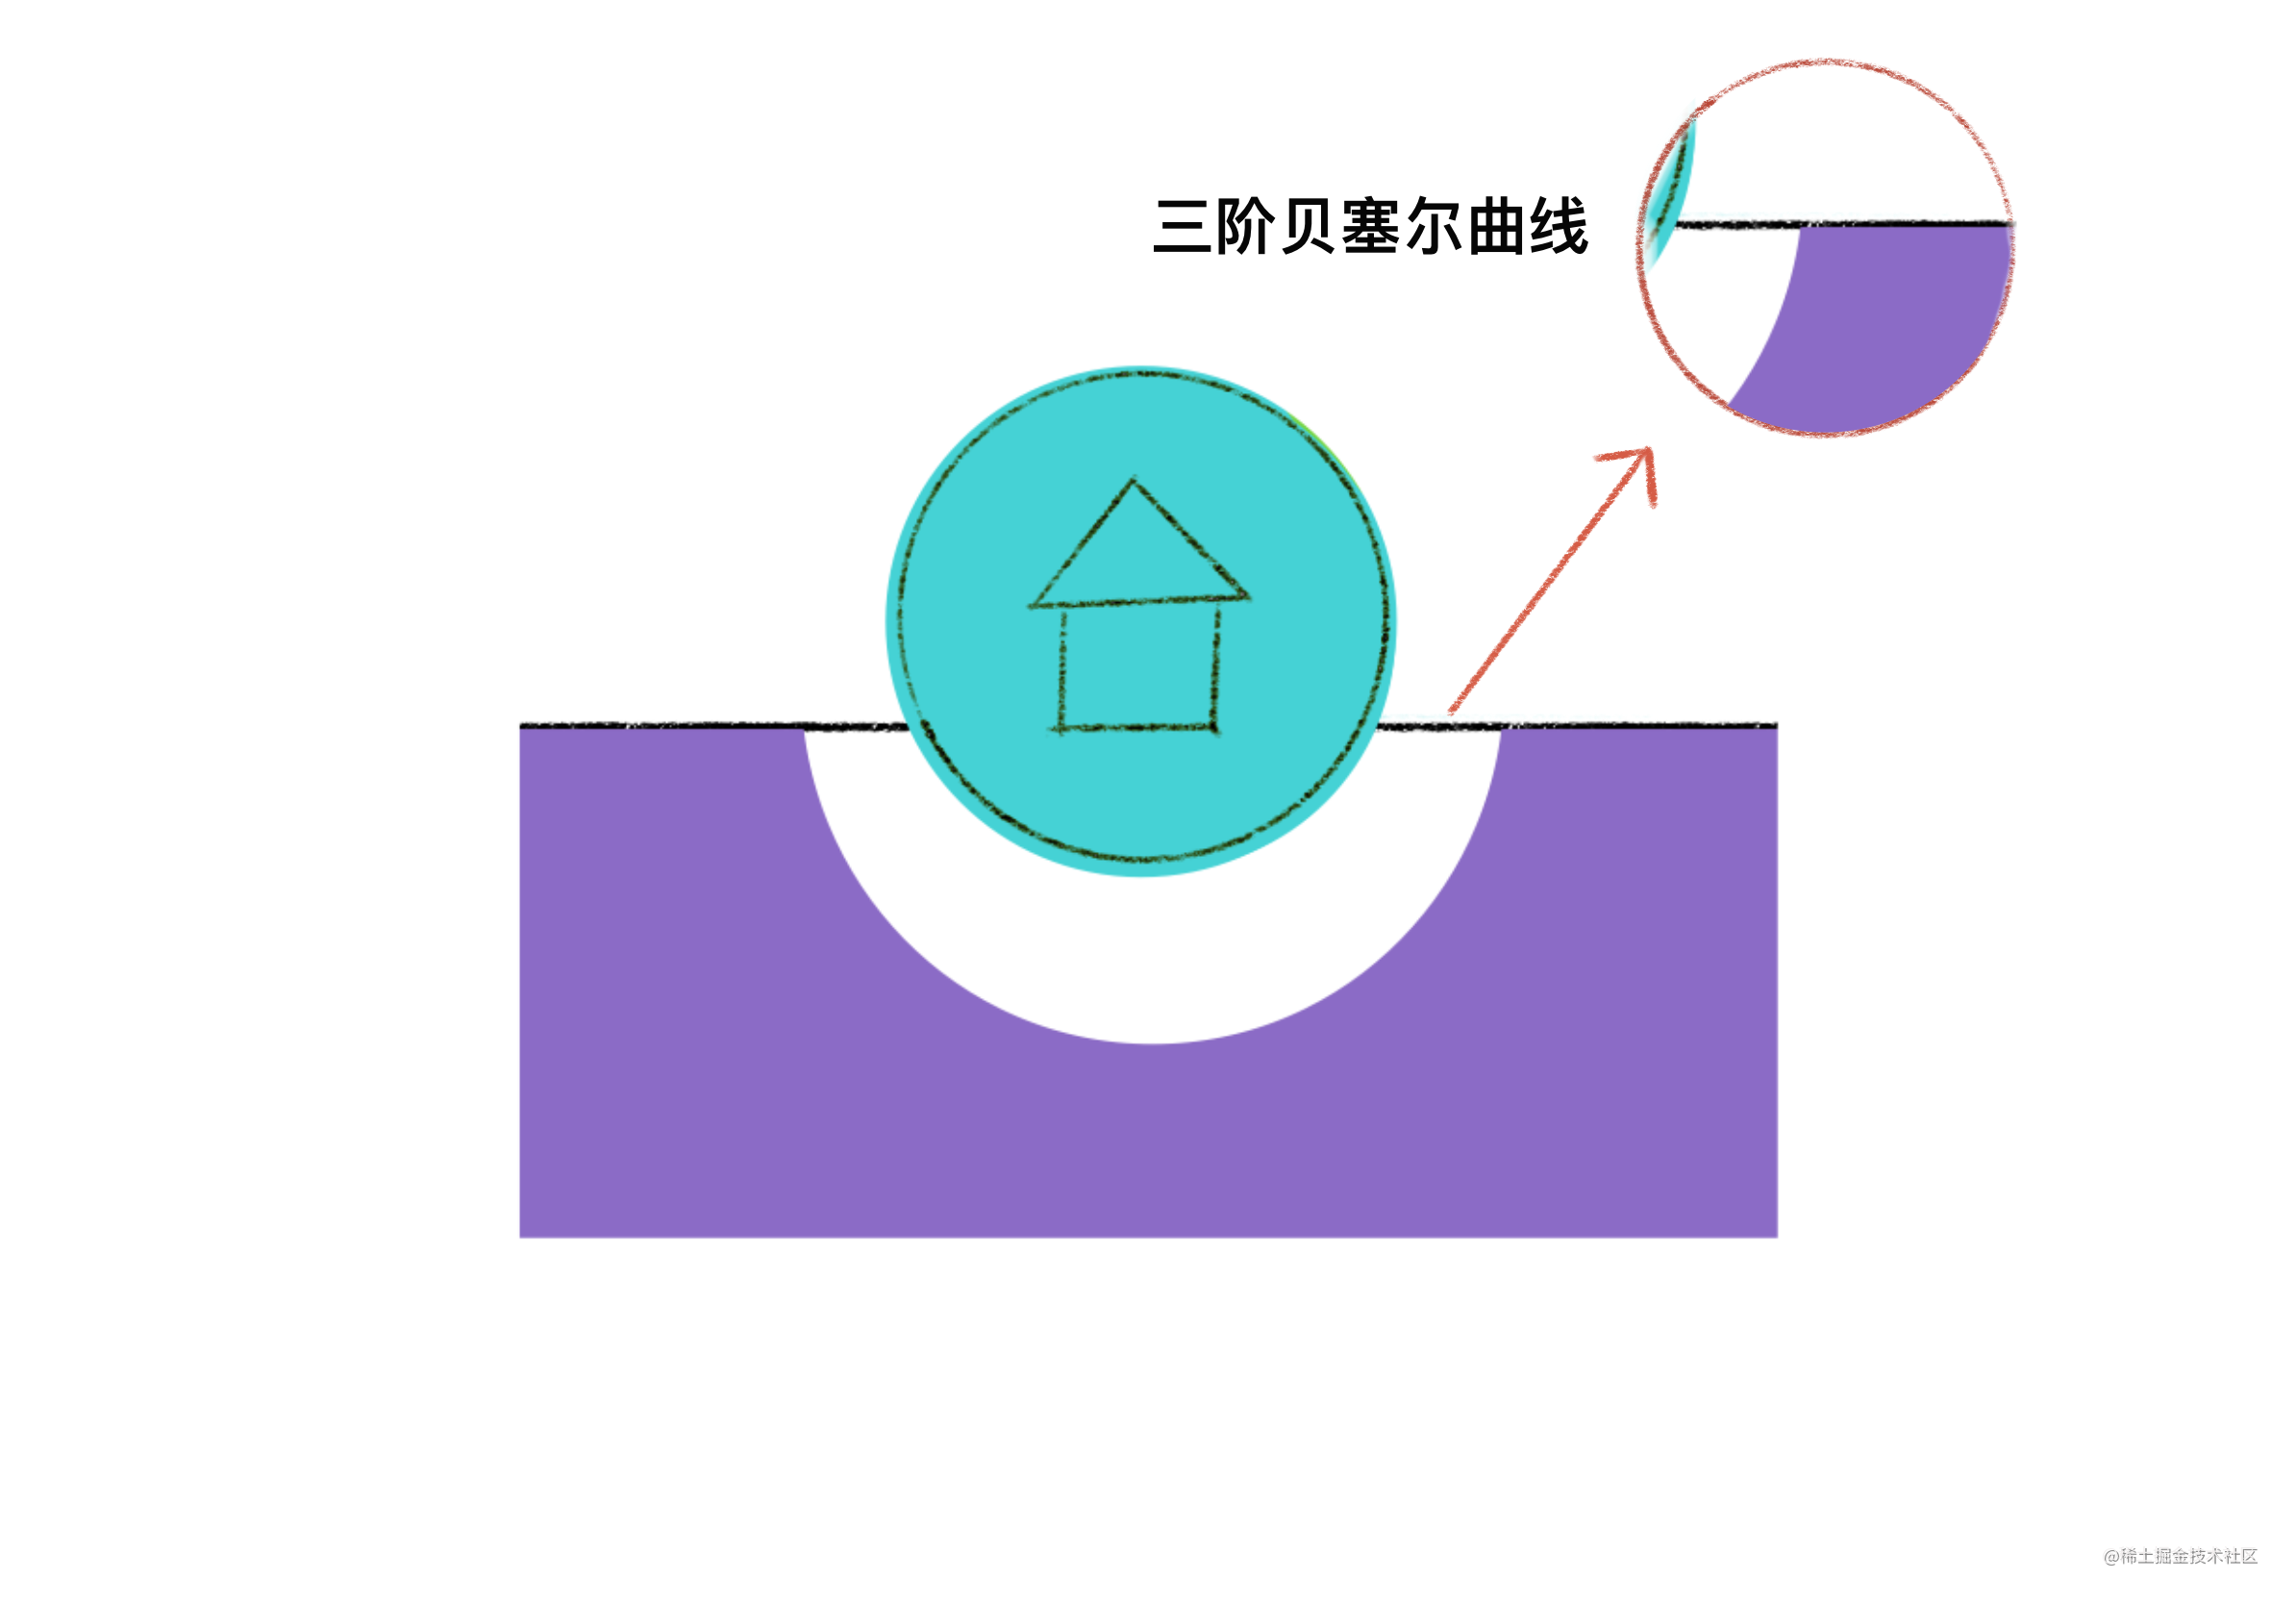
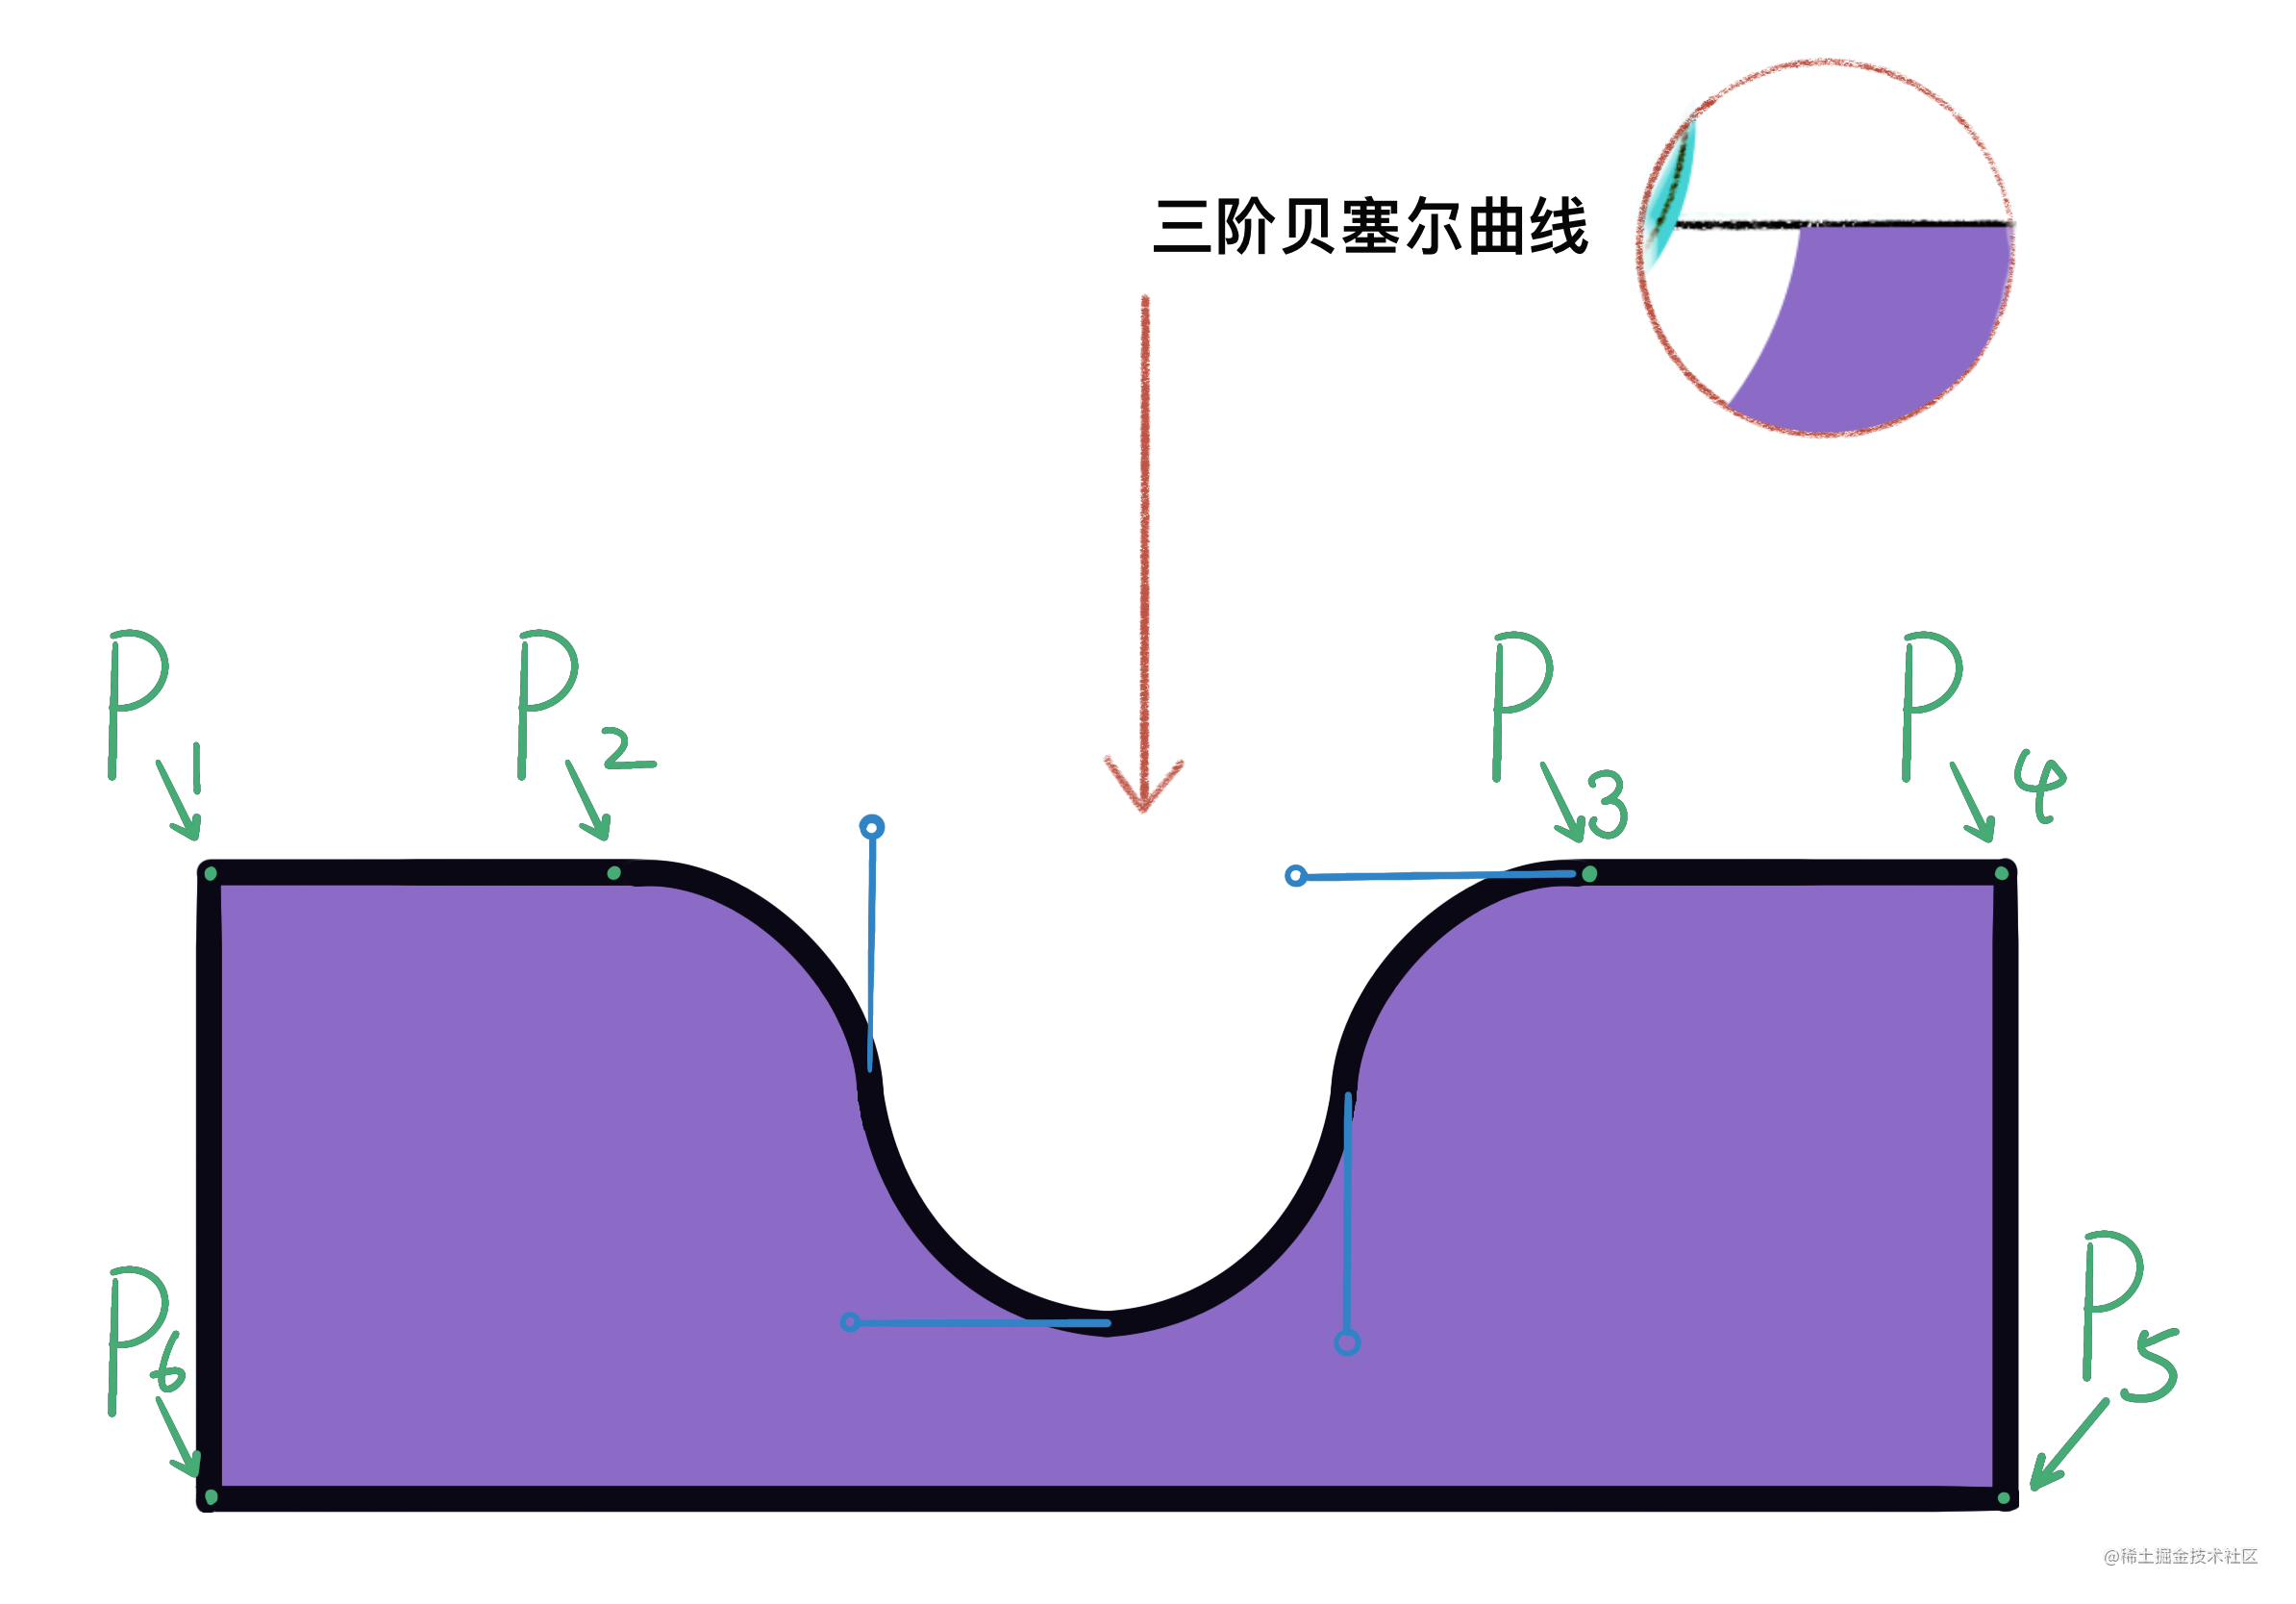
如 图 2 演示,该图使用了两个三阶贝塞尔曲线去实现一个凹槽的功能。
这部分需要一点点 PS 钢笔工具,如果不熟悉的话这里有在线绘制的网站Bezier Curves (desmos.com)可以调好了复制参数即可。
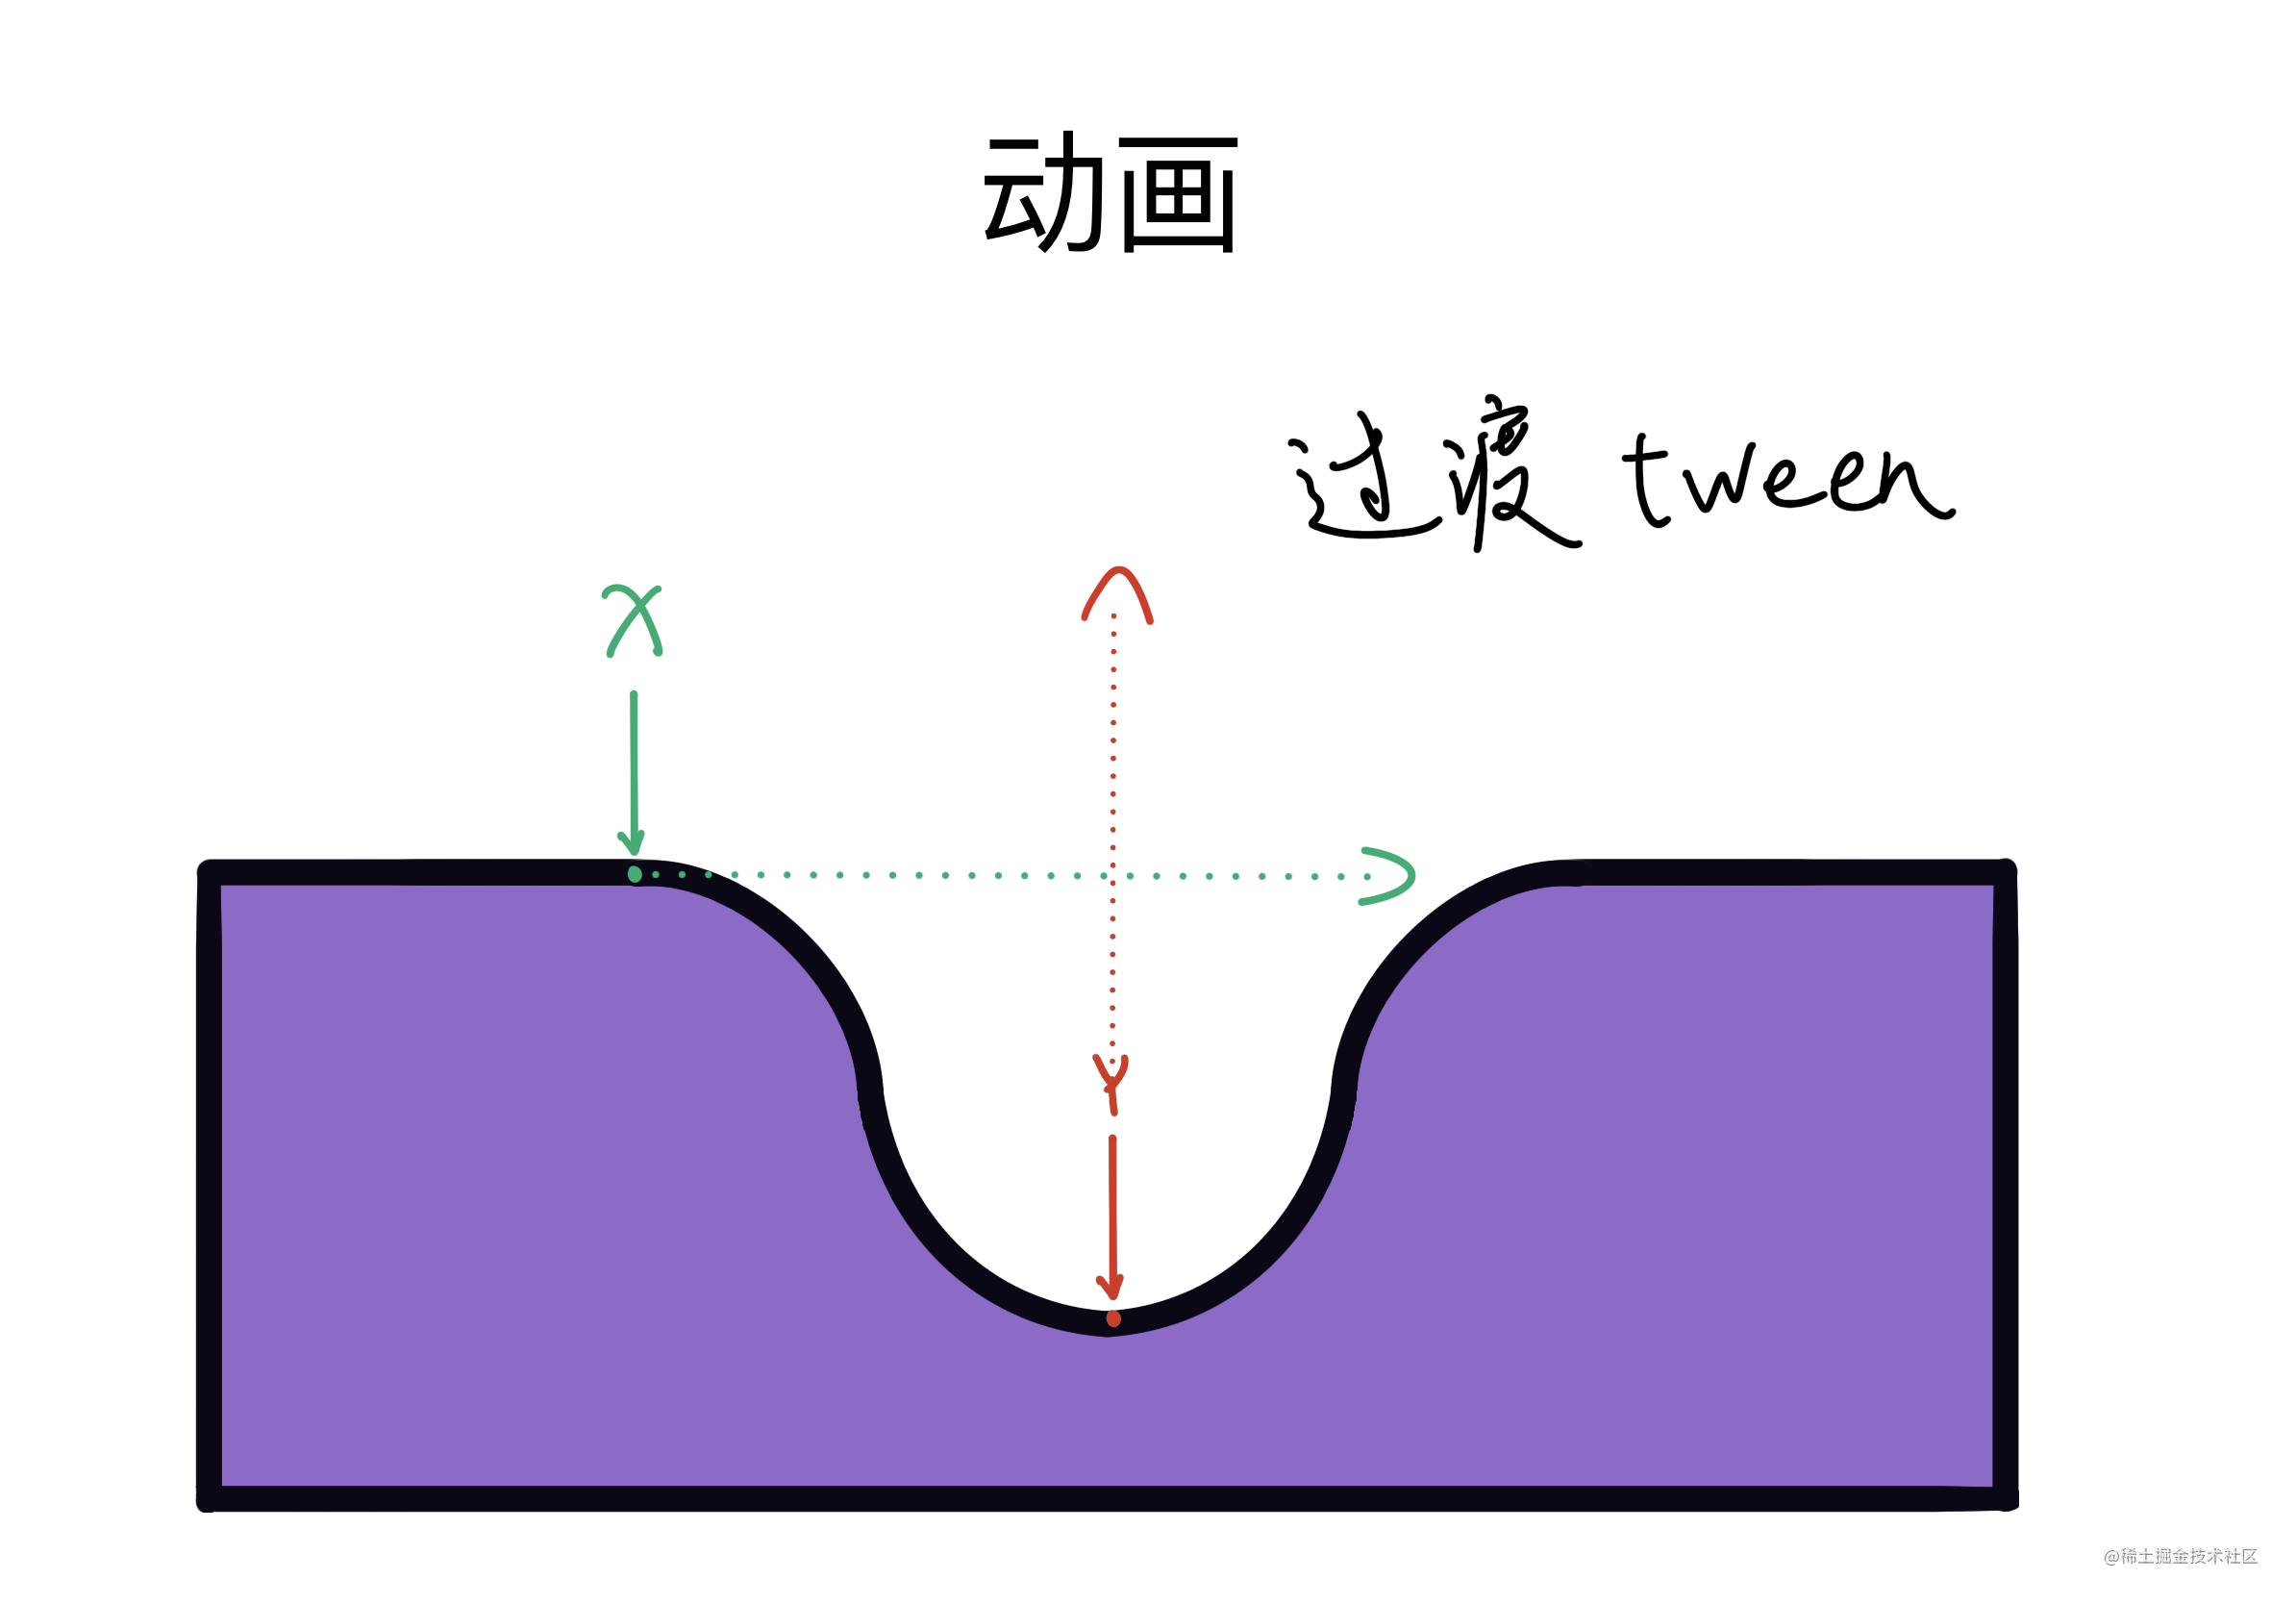
第四步(动画)
使用 Tween 过渡 X,Y 轴的值
final xAnimation = Tween(
      begin: 0.0,
      end: context.width,
    ).chain(customCurve).animate(_animationController.xController);

final yAnimation = TweenSequence([
    TweenSequenceItem(tween: Tween(begin: 40.0, end: -40.0), weight: 30),
    TweenSequenceItem(tween: Tween(begin: -40.0, end: 40.0), weight: 70),
]).chain(customCurve).animate(_animationController.yController);
通过当前 Index 控制 X,Y 轴的值,实现上下左右横移过渡。
  void _startBackgroundAnimation() {
    paintAnimationController.xController
        .animateTo(navController.navIndex.value / icons.length);
    paintAnimationController.yController.reset();
    paintAnimationController.yController.forward();
  }
剩下的就是把值绑定到 CustomPainter 上了。
全部代码
这篇提供思路,同理可在 React、Vue 中复刻。
篇幅有限,代码如有需要可评论回复,下次更新上来链接。
最后效果
